简介
如果你够细心的话,在前面几篇文章的例子里,你可能会发现我们所添加的 css 样式,全部写入到了所生成的 index.html 当中。而我们平时的开发中,往往是将样式独立出一个 .css 文件,然后引入到项目。
实际上,这两种做法,各自有各自的优点。
首先说写入到文件里的。要知道,web资源每次请求都是要消耗网络资源的,如果是通过 URL 引用样式文件,那么用户需要等待请求完成后才能看到渲染的界面,因此,在需要的样式较少时,实际上直接卸载<style>当中,是更好的选择,因为只需要访问页面时加载一次。
然而,当样式内容较多是时,单次相应已经不足以迅速完成,那么将样式表独立抽出较好,既方便调试、有不会产生请求的同步中断。
本篇文章将介绍如何在 webpack 打包时,抽离出独立的 css 文件,所用的项目为上一篇文章中建立的测试项目。
安装插件
上一篇文章中,我建议大家安装的extract-text-webpack-plugin便是今天的主角,如果你在上次练习中没有安装,那么现在进行安装:1
2# cs ~/project
# npm install extract-text-webpack-plugin@next --save-dev
修改配置
使用extract-text-webpack-plugin时需要修改webpack配置文件webpack.config.js,将上一篇文章中的webpack.config.js文件修改如下:1
2
3
4
5
6
7
8
9
10
11
12
13
14
15
16
17
18
19
20
21
22
23
24
25
26
27
28
29
30
31
32
33
34
35
36
37
38
39
40
41
42
43
44
45
46
47
48
49const path = require('path');
const hwp = require('html-webpack-plugin')
/** 导入 extract-text-webpack-plugin 插件 */
const ExtractTextPlugin = require("extract-text-webpack-plugin");
const ROOT_PATH = path.resolve(__dirname);
const APP_PATH = path.resolve(ROOT_PATH, 'app');
const BUILD_PATH = path.resolve(ROOT_PATH, 'build');
const SOURCE_PATH = path.resolve(ROOT_PATH, 'source');
module.exports = {
mode: 'development',
entry: APP_PATH,
output: {
path: BUILD_PATH,
filename: 'bundle.js'
},
module: {
/** 将 css-loader、sass-loader 交由 extract-text-webpack-plugin 处理 */
rules: [{
test: /\.s?css$/,
use: ExtractTextPlugin.extract({
fallback: "style-loader",
use: ["css-loader", "sass-loader"]
})
}, {
test: /\.(jpe?g|png|gif|ico)$/,
loader: 'url-loader?limit=10240'
}, {
test: /\.((ttf|eot|woff2?|svg)(\?v=[0-9]\.[0-9]\.[0-9]))|(ttf|eot|woff2?|svg)$/,
loader: 'url-loader?limit=10000&name=fonts/[hash:8].[name].[ext]'
}]
},
plugins: [
new hwp({
title: 'hello world app',
template:__dirname + '/source/template/index.html'
}),
/** 指定抽离出的文件名,本例中为 styles.css */
new ExtractTextPlugin("styles.css")
],
devServer: {
historyApiFallback: true,
hot: true,
inline: true,
progress: true,
},
}
可以看到,修改的项并不多。我们只需要将extract-text-webpack-plugin插件导入,将css-loader、sass-loader两个加载器指定给extract-text-webpack-plugin处理,并且添加一个extract-text-webpack-plugin导出实例就可以了。
配置完成后,所有样式将以styles.css通过<link>标签引入页面。
运行、对比结果
1 | # cd ~/project |
访问页面后,按
文本抽离
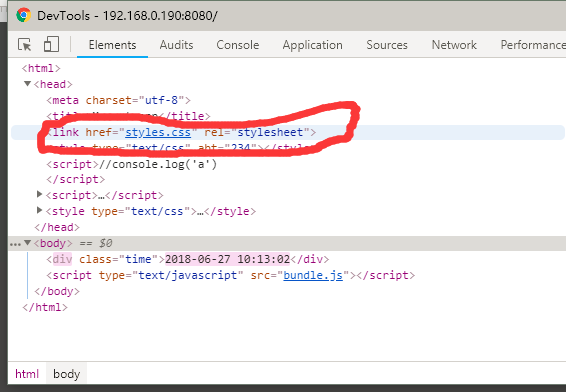
可以看到通过<link>标签引入了styles.css
未进行文本抽离
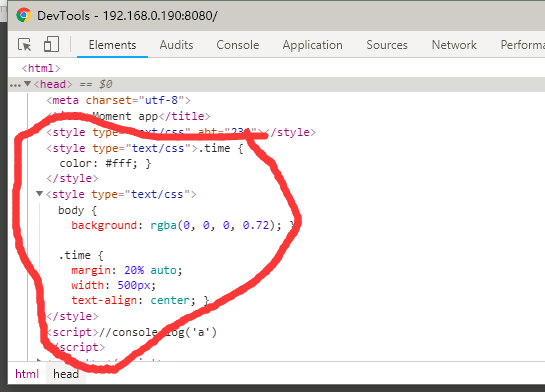
全部样式都写到了页面的<style>标签中。
遇到的几个错误
extract-text-webpack-plugin 版本问题
在前几次安装中一直按照下面方法安装的1
2# cs ~/project
# npm install extract-text-webpack-plugin --save-dev
但是安装完成后,一直报错,最后发现是由于install extract-text-webpack-plugin的版本过低,不支持webpack4。因此需要用以下方法安装:1
2# cs ~/project
# npm install extract-text-webpack-plugin@next --save-dev
一定要利用extract-text-webpack-plugin建立输出文件的实例
必须在 plugins 中增加 new ExtractTextPlugin("filename.css")

